|
|
||||||
|
|
 |
|
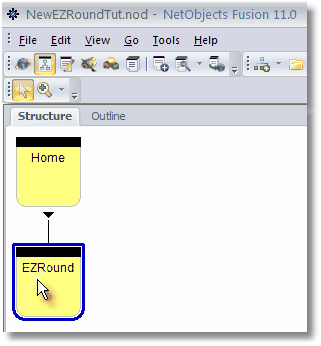
NOTE: Since HTML import in NOF10 and NOF11 do not work as expected, the old “Fast Import” tutorial has been replaced by a new method that works with NOF 7.5 through NOF 11. The tutorial steps are almost identical between NOF versions, but the interfaces may differ slightly. We will try to note obvious differences where they occur. IMPORTANT: This tutorial does NOT replace the steps needed to import the images slices and mark them for publishing as outlined in the EZRound “Centered” website tutorial as shown here. Getting started This tutorial assumes that you have created your EZRound design, exported it properly and that the Windows Explorer folder is still open to the project export directory. For simplicity, this tutorial uses a new blank NOF website but the principals will be the same if you are adding EZRound to an existing NOF project. Note: This tutorial is quite detailed and because of that it may seem long or difficult. It is not! After you follow the tutorial and do the import this way one time, you should be able to import other designs in just a few minutes. Creating a new EZRound “Library” page in NOF The first step is to add a new page in the NOF site view. Click the Add Page button on the toolbar and name the page EZRound as shown here:
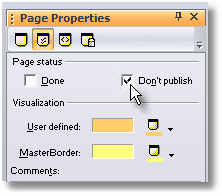
Next click on the Page Properties tab and check the Don’t Publish box.
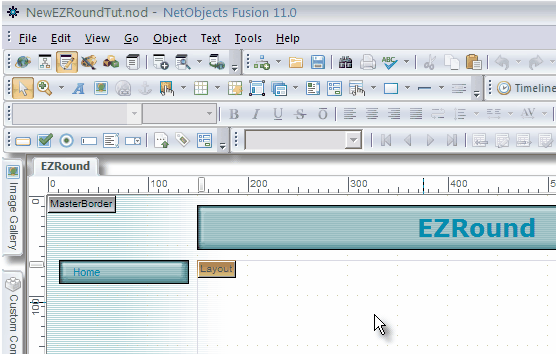
This will prevent the EZRound page from being included in your navigation or published to your website, but it is important that you do NOT delete this page as it is going to serve as a “library” for your EZRound designs. The next step is to switch to the Page View in NOF for the new page.
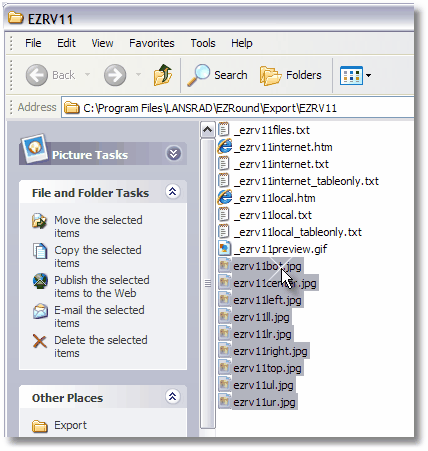
Leave your NOF window where it is and use the Windows Taskbar (or ALT+Tab) to switch to the Windows Explorer view of the export folder for your EZRound design. Note: if you are importing a design that you created earlier, you will need to open a copy of Windows Explorer to the export folder of your EZRound project before you proceed. Selecting the files created by EZRound In the Windows Explorer view of your files, select all nine of the .jpg or .gif files (which one you see will depend on the settings used when you created your design in EZRound) as shown here:
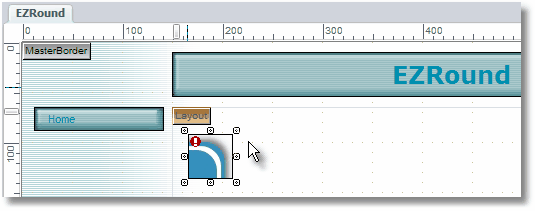
Hint: Hold the CTRL key and use your mouse to click and select multiple files. Bringing the files into NetObjects Fusion Once you have your nine files selected, position the mouse over them, left click ON any of the selected files and HOLD your mouse button down. Then drag mouse down to the Windows Taskbar and over the NetObjects Fusion button there. Pause for a second (do NOT release the mouse!) and Windows will bring NOF to the top automatically for you. Move your mouse to an area in the layout region (upper left works good) and ONLY THEN then release your mouse. The files will stack on top of each other. Just leave them there (and ignore the red exclamation marks that NOF gives as a warning that the images are overlapped).
Note: In reality all nine of the image slices have been automatically added to NOF as assets. This saves you the tedious task of adding them one at a time. If you were to spread them out, you’d see all nine slices as shown here:
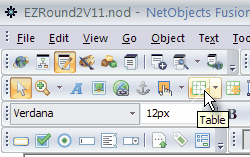
Creating the table to hold the design. The next step is to create a table in NOF to hold our EZRound design. This table will serve as a “container” for whatever you want to put inside it. Click the table button on the NOF toolbar:
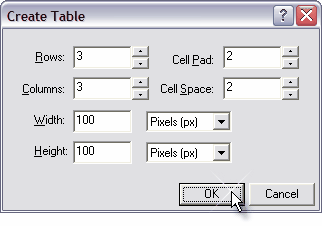
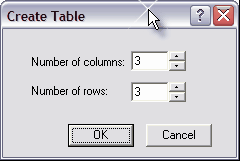
In the dialog that appears, set your table to be 3 rows by 3 columns and a height and width of 100 px each as shown here:
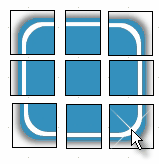
Why 100x100? The 100px wide by 100px tall is just a recommendation based on our testing of average exported EZRound designs. In reality the trick is that you don’t want the table to be any wider or taller than the combined width/height of the slices in your design. In this example, our slices (stacked in order) look like this:
If we took the slices needed to make up the center row we’d see this:
The two side slices are 45px wide each and the center one is 36px wide (these sizes can be found by clicking the image in Windows Explorer or in NOF if you unstacked them). 45 + 36 + 45 = 126 (so our table width of 100 is less than the total) If we took the slices needed to make up the center column we’d see this:
The top and bottom slices are 45px tall each and the center one is 36px tall. 45 + 36 + 45 = 126 (so our table height of 100 is less than the total) Keep in mind that the goal is simply that the height/width of your table when you create it is less than the total height/width of the slices that make up the image. This is important because it is going to force NOF to do the hard work of resizing the table for you (more on that later). Hint: if your design has small corners or no padding, then your table size may need to be smaller than 100px x 100px. Adjust the logic as needed. NOF Version Specific Notes: Hint: Some earlier versions of NOF will not have the option to set the height and width of the table as it is created. Instead you will see a dialog like this:
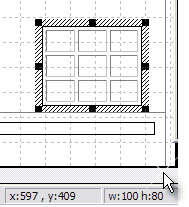
Just specify the 3 rows by 3 columns and click OK. Then use your mouse to resize the table so that it is no wider or taller than 100px (see the size indicator at the bottom of the screen as shown in the next screen shot). Note that NOF may prevent you from getting a perfect 100x100. Don’t worry as long as you don’t go over 100 on the longest side.
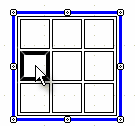
Adding the EZRound images to the table The next step is to add the EZRound images that will be used as the Background Image to five of the nine cells on your new table. Hint: Be careful that you do NOT mix up which cells get the EZRound slice set as a background image and which ones get added with the Picture tool in NOF. Add the background images first To add the first background image, click the left center cell of your table to select it as shown here:
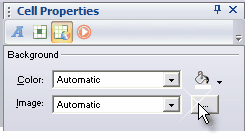
Next click the Cell Background button and then the background image selector button:
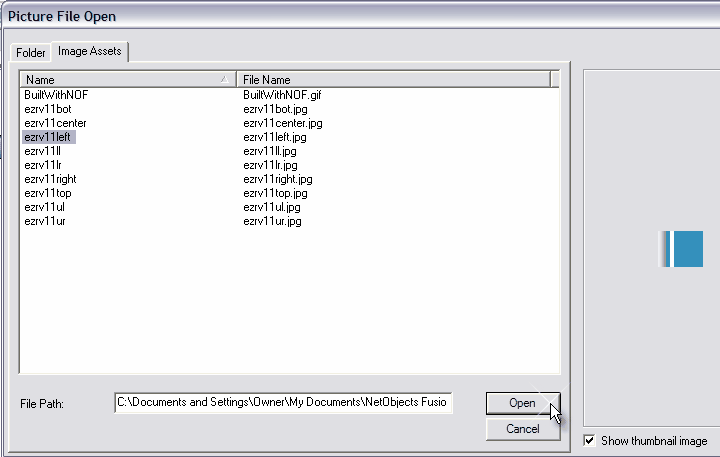
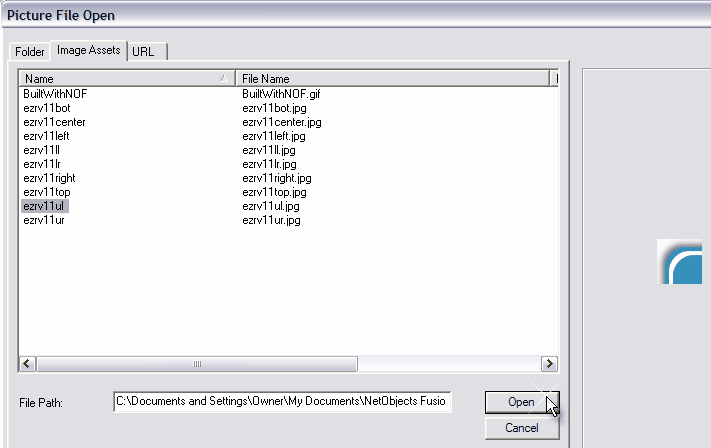
When the NOF Picture File Open window opens, click the Image Assets tab and select the EZRound image for the LEFT side (note that the word LEFT is part of the name and the image can be viewed in the preview when you click it). Click OPEN to continue.
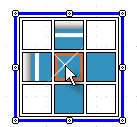
When the Picture dialog closes you should see the image you selected in the LEFT cell of the table. Repeat this process with the TOP, RIGHT, BOTTOM and CENTER cells. When you are finished your table should look like this:
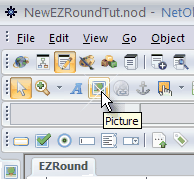
Hint: Don’t worry if some of the images seem distorted or are not fully displaying. Whatever you do - DO NOT manually resize the table at this stage of the import! Adding the corner images The next step is to add the four corner images as PICTURES so that they can hold the table design open and keep it from collapsing. Click the Picture tool on the NOF toolbar:
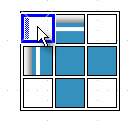
Next click in the upper left corner cell of your table as shown here:
When the NOF Picture File Open dialog window opens, it should still be on the Assets tab. If it is not, then select it and then choose the slice of your EZRound design that has the ul (upper left) as a part of the name. Note that the image preview will also help you get the correct slice. Click OPEN to continue.
Repeat this process for the Upper Right, Lower Left and Lower Right images. When all four corner images have been added your table will look something like this:
HINT: Don’t worry about the way things look and again - don’t try to manually resize the table yet. Adding a Layout Region to the center cell The next step is to add a NOF Layout Region to the center cell of the table. The Layout Region is the “canvas” or “workspace” where you will add any content that you want to be displayed in the EZRound container. It is also an important step of your import because it makes it easy to resize the design in NOF as needed. Before you start - click the center cell of the table to select it as shown here:
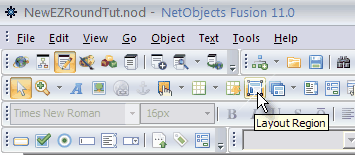
Then click the Layout Region button on the NOF toolbar:
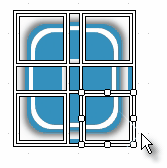
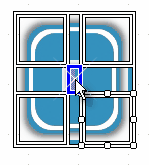
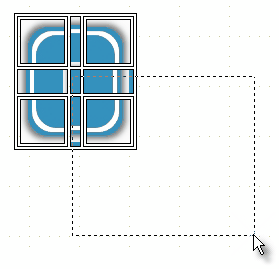
Next click the mouse in the center cell of the table and HOLD THE MOUSE BUTTON DOWN and drag outward as shown here:
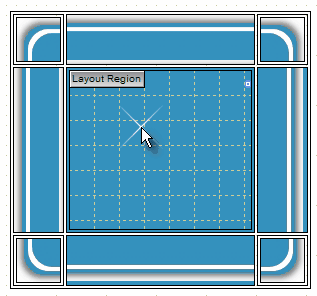
When you release the mouse, NOF will automatically resize the center cell of the table to hold the content (your layout region) as shown here:
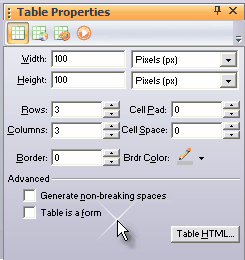
Collapsing the table Now that you have all your images and a layout region in place it is time to “collapse” the NOF table so that it does not interfere with the design. Click the Table Properties button and set the settings there as shown here:
Note that the Border, Cell Padding and Cell Spacing are set to zero and the Generate non-breaking spaces option is unchecked. After you make these changes, the table looks like this:
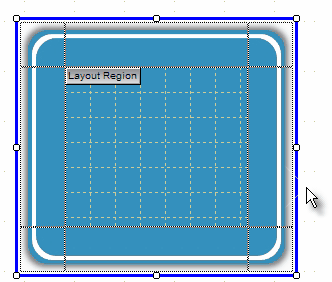
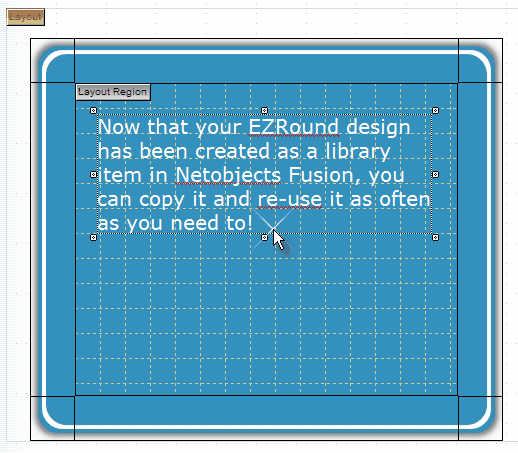
Hint: Unlike previous tutorials where you had to work hard in NOF to push the sides of the table cells inward to tighten up around the region, our use of a table that was SMALLER than the size needed forced NOF to do the work of resizing the cells outward to hold the full image sizes. This method is MUCH easier! Your import of the design is complete! You could stop here, but the rest of this tutorial will show you how to add content to the design and resize it. Copying the design to other pages You can click the outer wall of the table to select the entire design, then use CTRL+C to copy it to the Windows Clipboard. Then you can change to a different page in your website, click the layout region and use CTRL+V to paste a copy onto that page. You should keep the original design (remember that you are NOT to delete this page anyway) and use it as a “library” in case you want to use it in more than one page. Hint: You can also export the EZRound page (as a one page template) and import it into another website and your “library” is ready to use again! Resizing the design IMPORTANT: The only thing you really need to remember when resizing the design (up or down) is that you NEVER resize the table until you have resized the layout region first. Enlarging the design To resize the design, first click the layout region to select it (note where the “handles” are) as shown here:
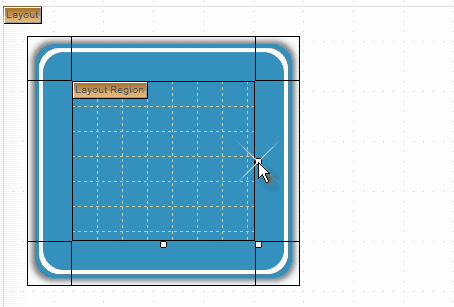
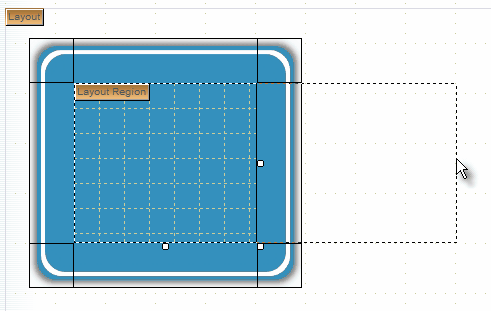
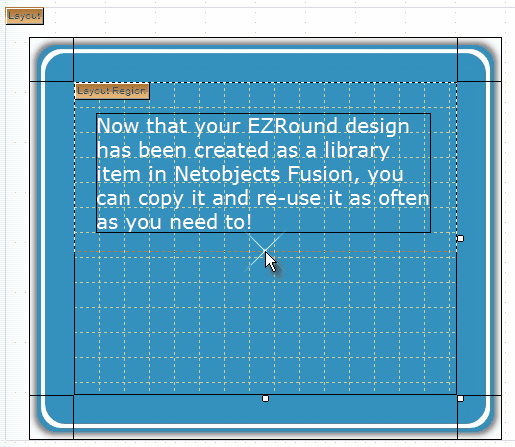
Then to make the design wider hold the mouse down at the edge of the region and drag it outwards as shown here:
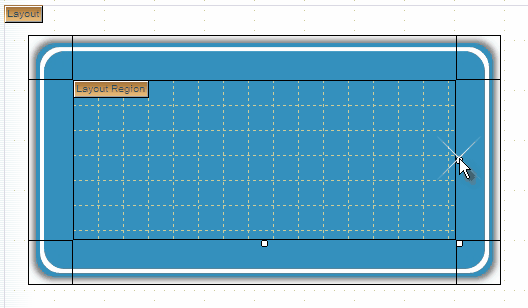
When you release the mouse, NOF will resize the design to the new (larger) region size automatically:
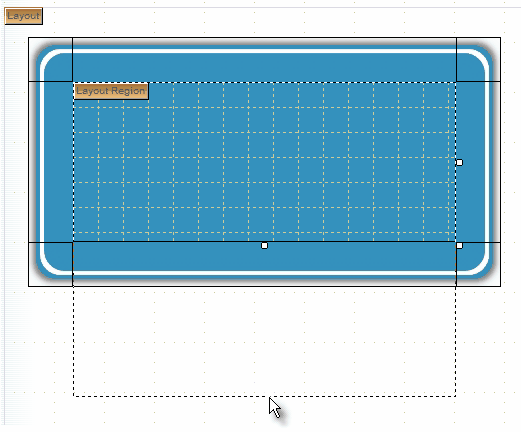
To make the design taller, first click the layout region (make sure the “handles” show you have it selected - not the table) and drag the edge downward as shown here:
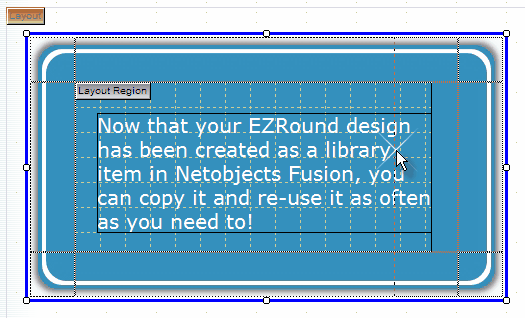
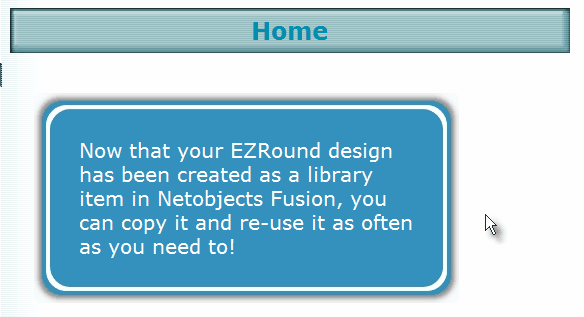
When you release your mouse NOF will resize the design to the new (larger) region size automatically. Adding Content to the layout region After the design is approximately the size you want it, you can move it around (remember to click the “edge” of the table to select it) or add any sort of content to it as needed. Hint: For precision movement or positioning, click the edge of the table to select all of it, then use your arrow keys on the keyboard to move it one pixel at a time. Hint: Do NOT add content to any cell other than the center (on the layout region) as this could have mixed results and break your EZRound container. In our example, we will add some text with the text tool.
Making the design smaller After positioning and sizing the text block as needed, the next step is to click the layout region to select it, then drag the lower edge of the layout region upwards to where we want it as shown here:
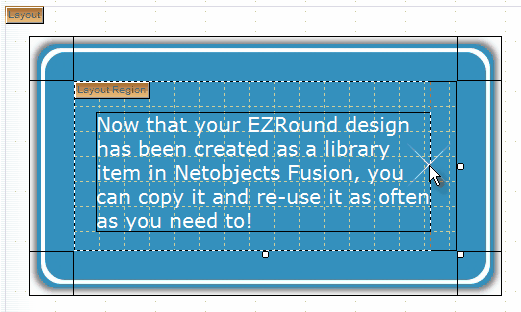
Usually as you reduce the height of the layout region, the table will collapse around it automatically. If it does not, then you can use the same technique as will be shown below to tighten up the right side. To tighten up the right side we click the layout region to select it, then drag the edge inwards as shown here:
Hint: on both of these resize screen shots, note the starburst that shows where the mouse was when we RELEASED the mouse button after the drag to resize the layout region. After we resize the layout region on the right side, there will be a gap between the edge of the layout region and the edge of the table as shown here:
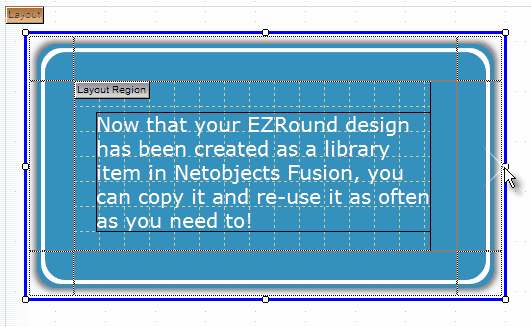
To tighten up the design on the right side, click the edge of the table to select it (note the “handles”) and then drag inwards to the left and PAST the edge of the layout region. Drag it like you are trying to fold the table back on top of the layout region as shown here by the starburst at the mouse position:
When you release the mouse, NOF will “snap back” and correctly resize the table so that it just fits the layout region as shown here:
That is all there is to it! Thanks for taking the time to view this tutorial. We hope that it provides you with an easy way to import your designs into NetObjects Fusion.
... The End ...
This tutorial is copyrighted and may not be reproduced or linked without permission. If you are interested in this material, please contact us.
|
| [Home] [NetObjects Tutorials] [Universal Import] [TableBasics] [Containers] [Adding Assets in NOF] [Centering Pages] [Full Page Borders] |
|
Copyright © 2003 - 2022 :: LANSRAD :: All Rights Reserved |
